Saxophone Sizing and Fitting 101


Saxophone Pad Sizing and Fitting
When selecting the correct size pad for a saxophone key cup, there are multiple factors to consider. Part of the consideration is the pad itself and the other is the key cup. Let’s first consider our goals.
I want a new saxophone pad to fit in a clean key cup with the following being true:
- The pad fits in the key cup with a snug fit
- The new saxophone pad dry fits in the key cup with a little friction but does not distort the pad (no wrinkles in the leather or bending of the cardboard backing)
- When the pad is dry fit in the cup, the pad completely fills the cup with no gaps (this shows me that adhesive will not leak out around the edge of the pad easily or cause seal issues down the road)
- When the pad is dry fit in the cup, I can turn the key cup upside down and the pad does not fall out (this shows me the pad has a snug fit)
To achieve the above goals, we need to:
- Prepare the key cup (Clean, Level, Round)
- Measure the key cup
- Dry fit a pad into the key cup
- Proceed with remaining keys
Prepare the key cup
Is the key cup clean, round and level? It will be difficult to fit a round pad into a key cup that is full of old adhesive, out of round and/or not level. Begin by removing the old pad and cleaning out the key cup, removing all the old adhesive. Then, inspect and if needed correct the key cup if it is out of round or not level.
Using the L20 Bench Anvil as an inspection tool, place the key cup rim flat on the bench anvil and see if it wobbles or has gaps between the anvil and the key cup rim. If the key cup needs leveling, you can use the F11 Canvas Mallet or the F5 Rawhide Mallet to tap down high spots while hanging that section of the key cup off the edge of the bench anvil as shown below. Take care not to dent the key cup of course.
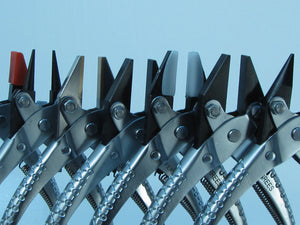
If the key cup rim is damaged making the cup rim out of round, you can use the F61G Parallel Action Pliers with smooth half round jaws to restore the shape of the key cup rim.
Measure the key cup
Now that we know the pad cup is clean, round and level we will measure the pad cup to ensure that the pads we select are our best fitting option. Because we have access to pads in increments of 0.5mm, we can measure in millimeters and will use this internal measurement, shown in the images below, to select a pad in this size to dry fit into the key cup. A good time for a note on pad sets and manufacturer specs.
- Manufacturers that do release pad sizes or cup sizes are using engineering spec numbers for the key cups which could always have slight variation, even minute, that could pop up now and again. There could also be variations within a given run of a certain model of saxophone. These things happen all the time in manufacturing. This is why measuring pad cups and dry fitting will always give you the best pad sizes for any given saxophone on your bench. It also is why pre-prescribed pad sets don’t always give you the best fitting pads for the saxophone on your bench.
- If ordering a set of pads for special projects you will ALWAYS have the best fitting pad set if you measure the pad cups and order pads based on your measurements and pad dry fitting process.
- I recommend having a good base set of as many 0.5mm increment sizes you can afford to have. The B525MC 500 Pad Assortment w/cabinet is a great pad stock option to have on hand and is the correct thickness for most all modern saxophones. Having a base set of pads on hand allows for you to take care of small repairs right away as they come in and allows you to use them as dry fitting testing pads for when you need to order specialty pads in a set for a specific repad project. Buying sets would be limited then to this scenario where you need a set of pads for a specific project that you don’t intend to stock.
Ok, enough on that, let’s measure the pad cup. Start by setting your digital caliper to measure in millimeters. Using the top part of the jaws on your caliper, measure the inside diameter of the pad cup inside the rim. I like to take measurements in two directions. If we pretend the pad cup is a clock, the measurements would be taken from 12 o’clock to 6 o’clock and another from 3 o’clock to 9 o’clock as shown in the images below.
Now that you have a measurement in two directions, you can dry fit a pad from your stock of pads to confirm the correct size for best pad fit. Notice that this pad cup above measured identically in both directions at 32.12mm. This is not always the case of course but will tell me which pad size to start with in dry fitting. I find that rounding up to the next 0.5mm increment pad size from your measurement is usually the pad that fits best.
- This of course is if the pads are running true to size. Leather is not perfectly uniform in its thickness so there will be variation at times in batches of pads that will affect diameter, thus the need to dry fit pads to be sure they fit well before installation begins.
- Another note to consider is that the key cup is made from a metal alloy and metal expands when heated, which you will do when you add adhesive and install the pad, so having good snug pad fit will ensure flexibility when the key cup does inevitably expand slightly with heat.
- Also, leather over time does shrink in the natural habitat of a saxophone. So having a pad that fits snugly in the cup will also allow for longevity of the pad you install. (Reminder that snugly does not mean the pad distorts in any way when dry fit)
Dry Fit the Pad
In the images above we see that the cup measured consistently at 32.12mm. As I said above, I would select a pad that rounds up to the next 0.5mm increment which would be 32.5mm. In the image below you will see the actual measurement of the pad and how it looks dry fit into the key cup. This is an ideal fit and will install well and perform well on the instrument. So, the 32.5mm pad is the pad size needed for this pad cup that measured 32.12mm.
Proceed with remaining keys
Now that you have a process established, you can repeat this on every key on the saxophone that you are working on. I typically do each of these steps in sequence on all the keys before going to the next step. So, for instance, I would clean out all the keys, check and fix for levelness and roundness on all the keys, then measure all the keys and document those measurements, then dry fit all the pads.
If you are doing this in preparation for ordering a pad set, I would have all my sizes written down and order my pad set based on my measured sizes and dry fittings. If I were using my stock pads, I would be ready to install the pads into the key cups with adhesive.
- Tami Ferree

Comments 0